Wednesday, October 27, 2010

Lesson 130- White Washing

Starting Memorial Day weekend, Husband and I started our bathroom update.  Doing a full bathroom renovation was definitely not in the budget.  But I figured we could update the bathroom fairly inexpensively.  And thus started our summer long project of working on the bathroom.  But our summer quickly filled with lots of plans and our bathroom extended beyond Labor Day weekend into fall, but we still had summer temperatures, so I think it should still count.

This was the last major step we did in our bathroom.  It is high impact and I love the way it turned out!!!  Here is the before picture


We removed the doors and the drawers and got to painting.

 My strategy was to go nice and slow, with lots of drying time in between coats.  Husband's strategy was a bit different.  Let's just say one of us had a better strategy, but I won't tell you who cause I don't want to hurt anybody's feelings.  But it wouldn't be my feelings that were hurt...


Once I was certain everything was dry we (and by we I mean Husband) put the cabinet doors back on and put the drawers back in.  While things were drying I also went through everything we had been storing in there and threw out a bunch and got the rest nice and organized!  We also attached silver knobs that we bought at Home Depot (I think.  I can never remember because they are literally just across the street from each other.)  And here's how they look now.


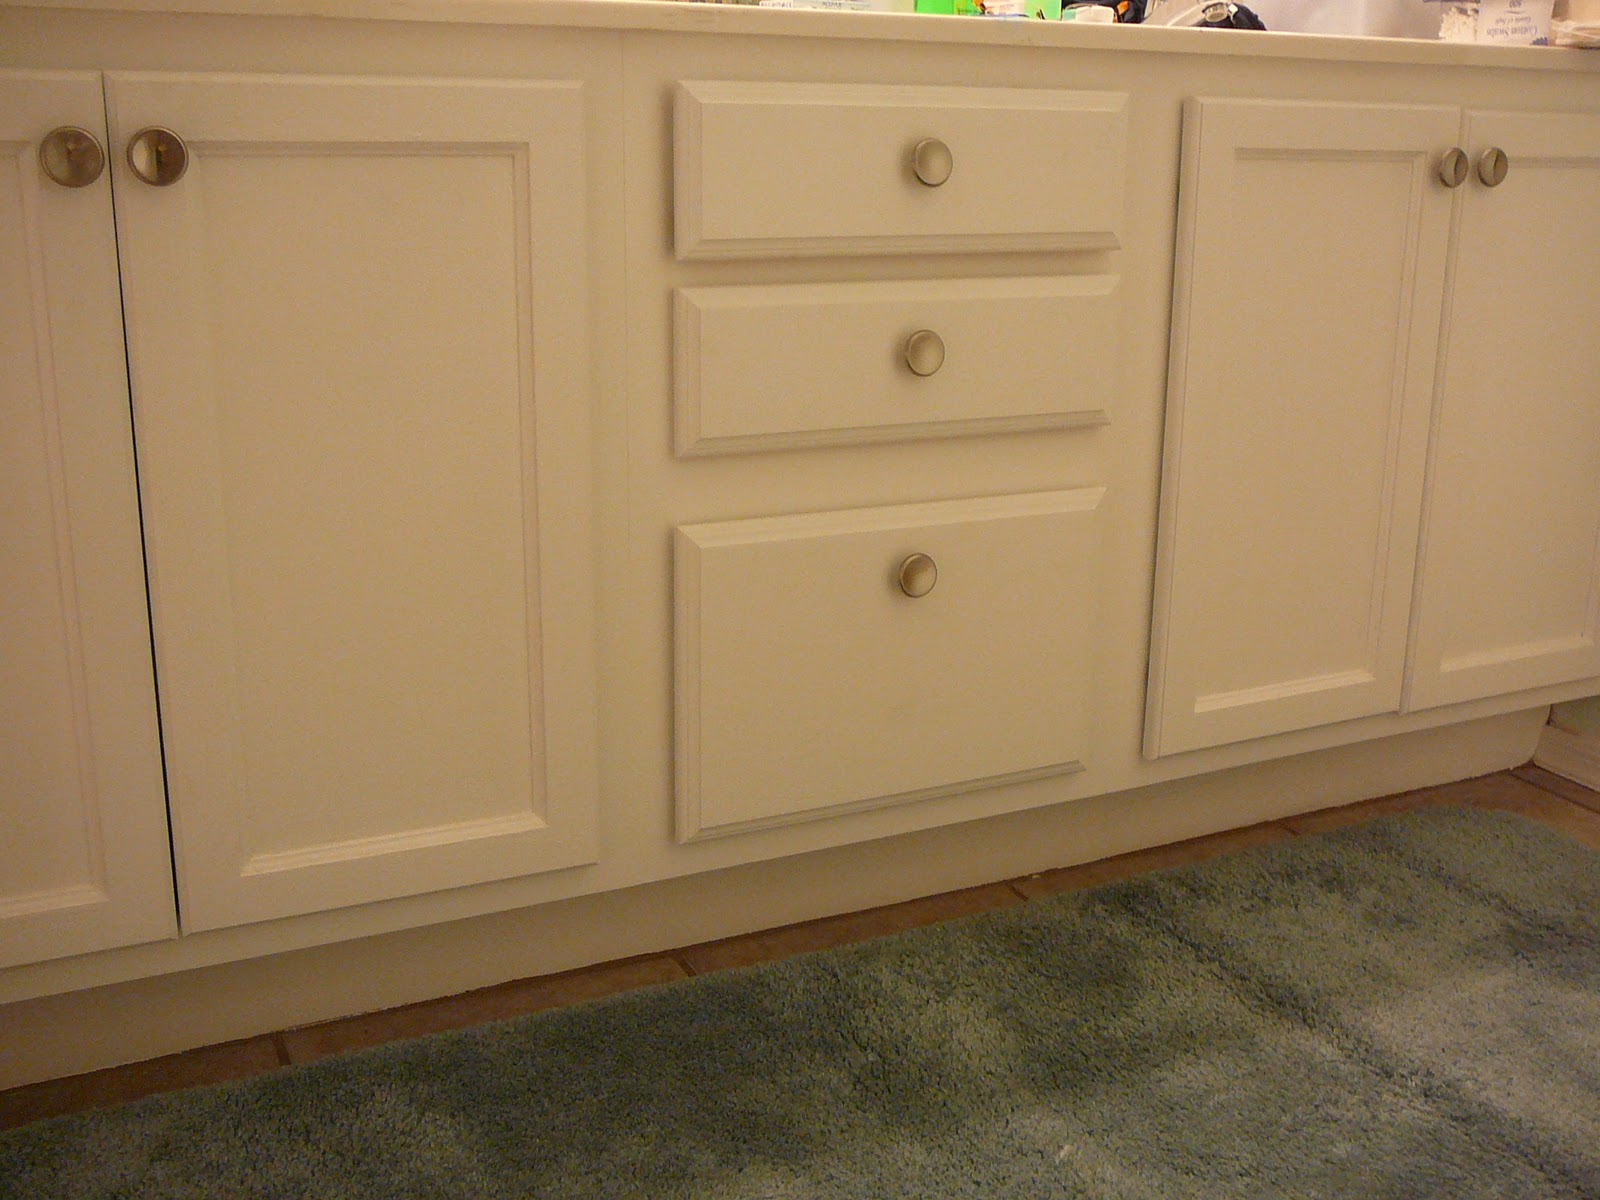
I LOVE it!!!  It makes such a difference in our bathroom and I think it's beautiful.

Tuesday, October 26, 2010

Lesson 129- Shredding

A few months ago I mentioned that I was attending Zumba twice a week at a gym near(ish) our house.  Well imagine my surprise when I arrived one day after work to see a completely empty parking lot.  There were two notices on the door.  One from the landlord stating that the gym had failed to pay rent and a lien had been put on the building.  The second from another local gym stating they would honor all contracts.  This gym wasn't too convenient to get too, especially after work when I tended to go.  The new gym was going to be even further.  So I decided to nix the gym membership all together.  But I needed some type of exercise program.  So...

I bought 'Jillian Michael's 30 Day Shred' at Target. 

Buy it here
 Holy good grief, that woman is like a slave driver!!!  But I'm kinda enjoying it...as much as one can.  I've only done it about 10 days and haven't moved passed level one, but it is a nice, cheaper alternative to a gym membership.  I'm also proud of myself that I have been somewhat disciplined enough to do the DVD at home.

So far there hasn't been a significant change in numbers on the scale, but I can definitely tell that it is getting easier.  But I miss my Zumba classes.  Maybe once the New Year hits I'll start researching places that offer it closer to our house.

Monday, October 25, 2010

Lesson 128- Hakuna Matata

Last weekend Husband and I went to Las Vegas, which you may remember was my anniversary present.  We got it late-ish Friday night.  Saturday morning we headed to "The Strip" first visiting Caeser's Palace where I finally found the Ugg boots I've been craving for about a year.


We feasted at the Paris Hotel's buffet--after waiting in line for about 2 hours.  Silly, I know, but I really wanted to eat there.  And I'm blessed enough to have a husband who will indulge me. 

We had fun taking silly pictures with people on the The Strip.


That night it was time to go see "Lion King" at Mandalay Bay.  It was phenomenal!  Amazing!  I loved every second and look forward to when I get to see it again (for a third time!).


The next morning we packed up and headed out.  And oh my gosh!  It took us forever to get home.  There was major traffic getting across the Hoover Dam and what should have taken us about 4 hours took us closer to 7.5.  It was brutal!  But we saw a pretty rainbow!


What a super anniversary present I got!!!  And what a super husband I have!!!

Friday, October 22, 2010

Lesson 127- Saving the Tatas

In honor of Breast Cancer Awareness Month, I decided to make this t-shirt with some help from my local Hobby Lobby.

Supplies:
* 3 different types of pink ribbon
* black t-shirt
* white fabric paint
* letter stencil
* 3 buttons
* needle and thread

I first cut the ribbon about 3 inches long.  To prevent the ribbon from fraying, I used a lighter to singe the ends.  I used a dab of hot glue to keep the ribbon in a cursive "l".  After arranging the ribbon letters on the shirt where I wanted them, I used a dab of hot glue to place them on the shirt.  Then I sewed the buttons on the part of the "l" where the ribbon crosses.

Now it was time to paint the rest of the words on the t-shirt.  I bought a screen letter kit.  I was kinda tricky.  I'd recommend practicing on some scrap fabric first.  Too bad I didn't give myself that advise till after I did it.  Oh well.


And oddly, the pics I took seem to have disappeared, so I'm only able to show you the finished product.  Sorry! 

Do you have a special shirt bringing awareness to breast cancer?  Have you seen the NFL players with their hot pink shoes and such?  I think it's awesome that it's so popular and hopefully a cure is just around the corner!

Thursday, October 21, 2010

Lesson 126- Making Napkin Rings

Here is one of the Halloween projects I did last year.  

A combination of wanting some Halloween decorations and not having a lot of money to spend on them I decided on making my own Halloween napkin rings.

Supplies:
*cardstock
*scissors/paper cutter
*ruler
*hot glue gun with extra glue sticks
*ribbon in 3 different colors (I used purple, spider web print, and green)

Directions:
1. Cut card stock into 2inch strips
2. With a hot glue gun, glue strips into rings about 2 inches in diameter
3. With first ribbon color, glue one end of ribbon on inside of napkin ring
4. Wrap in and out ring vertically with ribbon, gluing as you go.
5. Glue other end of ribbon on the inside of ring, once outside surface is completely covered.
6. With second ribbon color, wrap once around outside of ring (horizontally), gluing both ends.
7. Repeat step 6 with third ribbon color.

Sorry I don't have pictures of the process or better instructions--this post was kind of an after thought! But here's the final product. Hope you enjoy!

Wednesday, October 20, 2010

Lesson 125- Halloweens of Days Before

This was our first Halloween together


My mom always says that Husband looks like Garth Brooks in this picture.  But that wasn't intentional.  Anyone wanna guess our costumes?

Last year, we didn't dress up.  But we did dress Montana up.


We thought it would be funny to dress her up as a lobster since we had just returned from our New England/ Canada cruise.

I'm going thrifting this week in search of some necessities for our costumes this year.  And I'm very excited for our costumes this year.

Are you dressing up?  What was your favorite Halloween costume?  Or do you prefer dressing up your pets instead?

Tuesday, October 19, 2010

Lesson 124- Mini Cake Plate

Last time I went thrifting I found these...


I used the candle for this project and the vases were used for this project.  So all I had left were the little plate and the matching cup.  Immediately when I saw these on the shelf at Goodwill I knew what to do with them. 


I put a little Gorilla Glue around the rim of the cup.  


 I put the plate upside down on the counter then the cup upside down on the plate making sure to have it centered.


Gorilla Glue works best with some weight while it dries, so I put the heaviest book we own on top.  I allowed it to dry over night.


Once I was satisfied that it was completely dry, I took the book off and flipped it over.  My favorite thing about the plate is the edging.  I can add ribbon to it to update it for different seasons.

Ta Da!

Monday, October 18, 2010

Lesson 123- My First Cake Revisited

This was the first cake I ever made (by myself).  And in the spirit of Halloween I thought I should share it again.


And here's the original post if you're interested.

Happy Monday!

Friday, October 15, 2010

Lesson 122- Chicago Caper Party

Yesterday I shared with you the tablescape for our Murder Mystery Dinner. Today I'll share some of the pictures we took that night.

This was where we got everything we needed to 'host a murder'. I had tons of fun and hope we can plan another one.


When we sent out the invitations we assigned characters to each guest.  We didn't require costumes, but did recommend them.  We figured it would be more fun that way.


And everyone used what they already had in their closets or a visit to Goodwill or Dollar Store for their costumes.  How cool is that?!?!

Menu:
Antipasto Plate (meats and cheeses, crackers, olives, and pepperacinis)
Salad with Italian Dressing
Chicken Scallopini with spaghetti
Garden Herb bread
Sticky Toffee Pudding Cupcakes

Drinks:
Beer 
Wine
Vodka w/ different mixers
Iced Tea
Water


Thursday, October 14, 2010

Lesson 121- Chicago Caper Table

This last weekend Husband and I hosted a 1920's themed Murder Mystery Dinner.  I was so pleased with how the tablescape turned out and wanted to share it with you.


Centerpieces


Place Settings


Wednesday, October 13, 2010

Lesson 120- Pumpkin in a Jar

I've seen these all over the blogosphere and wanted some for my own.  I used the mason jars I bought thrifting a while back, tissue paper left over from a gift bag, scrapbook paper, and acrylic paint.  Oh, and don't forget the Mod Podge.

 I cut the tissue paper in to strips about an inch thick and glued them to the inside of the jar with Mod Podge.  This wasn't easy!  Don't use mason jars!  Your hands may get stuck inside the jar.  And yes, I'm speaking from experience!

 Then I painted the rim of the jar with green acrylic paint.
Don't worry!  The white Mod Podge will dry clear.

Then I cut out faces from black cardstock.  I looked up Jack-o-Lantern faces from the internet for inspiration.


They're cute, but I think I'll stick to ol' fashioned punkin carvin!!!

Tuesday, October 12, 2010

Lesson 119- Pottery Barn from the Dollar Store

I know this isn't the most original idea, but I love the way mine turned out.  I may make 23 more.  Or maybe not, maybe just 17. 

Remember I bought these two candlesticks from Goodwill a while back?
I wasn't entirely sure what I was going to use them for, but I was certain that it wasn't going to be candlesticks.  Then I discovered a random vase in the back of my car.  I have no clue what it was doing there, perhaps cleaning my car should be a post.  Someday... gosh I'm rambling today. 

Anyways...I decided to turn the vase and the candle sticks into some hurricane vases.  I bought a third candlestick and two more vases in different shapes and sizes at the dollar store. 

I put a thin layer of Gorilla glue on the top of the candlestick, flipped the vase upside down, and carefully placed the candlestick holder in the center of the base of the vase.  Next, I put a super heavy book on top, being very careful to balance it without letting the candlestick holder slide around.  Kinda tricky.  I kept the book there for about 12-ish hours.

Then I filled them up with some Halloween decorations.  The largest was filled with a bag of candy corn.  But don't eat them!  I first sprayed them with acrylic sealer.  This way they don't get sticky, don't attract bugs and I can keep them for a couple of years for decorating.  I like decorating with them, but think they're too gross to eat.  In the medium one I put some Spanish moss, that I had from this project, and some plastic skulls from the Dollar Store.  In the little one I put some silver glitter spiders I found at the Dollar Store too.

Thank you Potter Barn for being so inspirational!  And thank you Dollar Store for being so affordable!

Monday, October 11, 2010

Lesson 118- Planting Candy

Last year Husband and I had way more Trick-or-Treaters than we anticipated.  This year we are prepared!  We bought a big ol' bag of candy from Costco (and are doing our best to not eat it all before Halloween.)  Perhaps we should have waited a few more weeks to buy the candy.  But anyway, I digress.

Here is what we're hold the candy in for distribution to cute/scary/funny kiddos.


So very festive, right?!  No worries my friends!  I didn't leave it this week.

I first spray painted the planter with $0.98 black spray paint from Wally World.  
Once it was dried (and wiped off, and then dried again) I added some Halloween stickers found in the scrapbooking section of Hobby Lobby.  The stickers needed some extra love to stick, so I reinforced them spray adhesive.

Once the stickers were sufficiently stuck, I went over the entire thing with a couple of coats of Mod Podge.  Finally, I sprayed the entire thing with an acrylic sealer.  Now it was ready to be loaded with candy. 
Yummy!!!!
Anyone wanna share what their favorite candies are?  Any else like me and are not a choc-o-holic?


Get Your Craft On
 http://linda-coastalcharm.blogspot.com/

Related Posts with Thumbnails